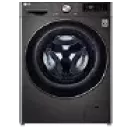
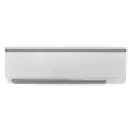
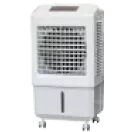
Find a wide range of window ACs on Bajaj Mall. Then, visit any of Bajaj Finserv’s 1.5 lakh partner stores in 4,000 cities to select a model that fits your cleaning preferences. Enjoy Easy EMI and zero down payment offers exclusively with Bajaj Finserv.
3 min
12-Feb-2025
A window AC is a great way to keep your room cool, but proper installation is key to ensuring its efficiency. Whether you are setting up an AC for the first time or replacing an old one, knowing the right steps will help you avoid common mistakes. Installing a window AC correctly enhances cooling, reduces energy consumption, and extends the unit’s lifespan.
Find a wide range of window ACs on Bajaj Mall. Then, visit any of Bajaj Finserv’s 1.5 lakh partner stores in 4,000 cities to select a model that fits your cleaning preferences. Enjoy Easy EMI and zero down payment offers exclusively with Bajaj Finserv.
Find a wide range of window ACs on Bajaj Mall. Then, visit any of Bajaj Finserv’s 1.5 lakh partner stores in 4,000 cities to select a model that fits your cleaning preferences. Enjoy Easy EMI and zero down payment offers exclusively with Bajaj Finserv.
Complete installation of window-type air conditioners
Installing a window air conditioner is a straightforward process when done correctly. Whether you are setting up an LG window AC or any other brand, proper installation ensures efficient cooling and long-term performance. This guide covers a step-by-step installation process, including how to install a unit on a concrete wall, along with important safety precautions.
If you are looking to buy a new AC, visit one of our partner stores, pick the AC of your choice, and convert its cost into Easy EMIs. With a flexible repayment tenure of up to 60 months. This financing solution from Bajaj Finserv is available on 1 million products.
Tools and materials needed
- Measuring tape
- Drill and screws
- Mounting brackets (if required)
- Foam insulation strips
- Screwdriver
- Level
- Support bracket (for extra stability)
- Window sealing kit (if applicable)
Step-by-step installation process
- 1. Choose the right location: Select a window that provides proper ventilation and support for the AC unit. Ensure that there are no obstacles that could block airflow. If installing on a concrete wall, make sure it is strong enough to hold the unit securely.
- 2. Measure the window or wall opening:Use a measuring tape to check the window’s width and height. Compare it with the AC’s dimensions to ensure a proper fit. If installed on a wall, mark the exact position where the AC will be mounted.
- 3. Prepare the mounting area: For window installation, open the window and clean the area. If using a support bracket, secure it to the window frame according to the manufacturer’s instructions. For concrete wall installation, drill holes into the wall and insert wall anchors or mounting brackets to hold the AC securely. Use a level to ensure that the unit will sit evenly.
- 4. Insert and secure the AC unit: Lift the window AC carefully and place it on the support bracket or inside the window opening. Slide the accordion side panels out to fill any gaps in the window frame. If mounting on a concrete wall, ensure the brackets align properly before securing the unit. Use screws to secure the AC in place, following the manufacturer’s guidelines.
- 5. Seal the gaps and insulate: Apply foam insulation strips around the AC to prevent air leaks. If installing on a window, lower the sash to sit tightly against the top of the unit and secure it with additional brackets if required. For a concrete wall setup, use a weatherproof sealant around the edges of the AC to keep the room insulated and prevent outdoor elements from entering.
- 6. Connect the power supply: Plug the AC into a dedicated electrical outlet to avoid power overload. Ensure that the circuit breaker can handle the unit’s power requirements.
- 7. Test the AC: Turn on the LG window AC and check for proper cooling, airflow, and drainage. Adjust the settings and fan speed to ensure that everything is functioning correctly. If you notice excessive vibrations or unusual sounds, recheck the installation to ensure that the unit is level and securely mounted.
Installing an AC on a concrete wall
Installing a window AC on a concrete wall requires additional steps to ensure stability and support.- Mark the wall for the AC’s dimensions and drill holes to fit the mounting brackets.
- Use heavy-duty wall anchors to secure the brackets firmly.
- Ensure proper drainage by angling the AC slightly downward at the back.
- Seal around the unit using foam strips and weatherproof caulking.
Safety precautions
- Turn off the power before starting installation to prevent electrical hazards.
- Use a support bracket for added stability, especially for heavier AC units.
- Wear safety gear such as gloves and safety glasses while drilling or handling sharp edges.
- Do not tilt the AC excessively, as this may affect drainage and cooling efficiency.
- Secure the window or wall opening to prevent any movement after installation.
Cleaning and maintenance of window air conditioners
Regular cleaning and maintenance of a window air conditioner ensure optimal cooling, energy efficiency, and a longer lifespan. Whether you own a window AC or any other brand, following a structured maintenance routine helps prevent dust buildup, improves airflow, and keeps the unit running smoothly. This guide covers step-by-step cleaning procedures, essential maintenance tips, and best practices for keeping your AC in top condition.Cleaning procedures for window ACs
- Turn off and unplug the AC: Before starting, switch off the unit and unplug it from the power source to ensure safety.
- Remove the front panel and filters: Carefully detach the AC’s front cover to access the air filters. Most window ACs have easily removable filters for hassle-free cleaning.
- Clean the air filters: Wash the filters with mild soap and water. Allow them to dry completely before reinstalling. Cleaning the filters every two weeks prevents dust accumulation and improves airflow.
- Vacuum the evaporator and condenser coils: Using a soft-brush vacuum attachment, remove dust and dirt from the evaporator (inside) and condenser (outside) coils. For deeper cleaning, use a coil cleaner spray.
- Check and clean the drain hole: A clogged drain hole can cause water leakage. Use a small brush or pipe cleaner to clear any blockages.
- Wipe the fan blades and vents: Dust buildup on the fan blades can reduce efficiency. Use a damp cloth to clean the fan and air vents.
- Reassemble and test the AC: Once everything is dry, reattach the filters and front panel, then turn on the unit to check its performance.
General maintenance tips
- Inspect the unit regularly: Look for signs of dust buildup, water leaks, or unusual noises. Early detection of issues helps prevent major repairs.
- Keep the area around the AC clean: Ensure no obstructions block the airflow around the AC unit, both inside and outside.
- Check the thermostat settings: Adjust the temperature settings for efficient cooling and lower energy consumption.
- Ensure proper AC positioning: The unit should be slightly tilted backwards to allow proper drainage and prevent water from collecting inside.
- Avoid overloading the circuit: Use a dedicated power outlet for the AC to prevent electrical issues and ensure safe operation.
Best practices to ensure efficiency and longevity
- Use energy-saving modes: Many modern window ACs feature eco modes and programmable timers to reduce electricity consumption while maintaining cooling efficiency.
- Schedule professional servicing: A yearly maintenance check by a technician ensures that all internal components are functioning correctly and prevents unexpected breakdowns.
- Replace old filters if necessary: If the air filters are worn out or damaged, replacing them improves air quality and cooling performance.
- Protect the AC during off-seasons: If the AC will not be used for an extended period, cover it with a protective case to prevent dust accumulation.
- Monitor refrigerant levels: Low refrigerant levels can impact cooling performance. If the AC is not cooling effectively, a professional can check and refill the refrigerant if required.
Special installation considerations for concrete walls
Installing an air conditioner on a concrete wall requires additional planning, tools, and reinforcement to ensure that the unit is securely mounted. Unlike wooden or drywall installations, concrete requires drilling into a solid surface and using heavy-duty fasteners for support. Proper preparation and execution can help prevent damage and ensure long-term stability.Tools and materials needed
- Drill with a masonry bit
- Wall anchors and heavy-duty screws
- Level and measuring tape
- Concrete saw (if cutting an opening)
- Mounting brackets for additional support
- Weatherproof sealant
- Safety gear (gloves, goggles, and dust mask)
Steps unique to concrete installations
- Select the installation location: Choose a spot with proper ventilation and clearance for the AC unit. Ensure that the wall can handle the weight of the AC.
- Mark and measure: Use a measuring tape and level to mark where the unit will be installed. If cutting a new opening, outline the dimensions accurately.
- Drill mounting holes: Using a drill with a masonry bit, create holes for the mounting brackets or wall anchors. For larger AC units, ensure that the brackets are reinforced with multiple screws for stability.
- Install support brackets: Secure the metal brackets into the drilled holes with heavy-duty wall anchors and screws to provide extra support.
- Position and secure the AC unit: Carefully lift the AC into place, ensuring it sits level on the support brackets. Secure it using additional screws and brackets if required.
- Seal the edges: Apply a weatherproof sealant around the unit to prevent air leaks and water seepage. This is especially important for concrete walls, as cracks may develop over time.
- Test the installation: Plug in the AC and test its cooling efficiency. Ensure that the drainage system is functioning properly, with water flowing outwards instead of pooling inside.
Troubleshooting common issues
- Drilling difficulties: Use a high-powered drill with a masonry bit designed for concrete to prevent overheating or breaking.
- Loose installation: If the unit shifts or feels unstable, double-check the wall anchors and reinforce them with additional fasteners.
- Improper drainage: Tilt the AC slightly downward at the back to ensure proper water drainage.
- Air leaks: If cool air escapes around the AC edges, apply additional insulation or caulking to improve efficiency.
If you are looking to buy a new AC, visit one of our partner stores, pick the AC of your choice, and convert its cost into Easy EMIs. With a flexible repayment tenure of up to 60 months. This financing solution from Bajaj Finserv is available on 1 million products.
Explore window air conditioners on Easy EMI with Bajaj Finserv
Upgrade your home with the perfect window AC available on Bajaj Mall. Whether you need a compact unit for small spaces or a high-performance model for superior cooling, there is a wide selection to choose from. Explore energy-efficient designs built for durability and convenience. Additionally, Bajaj Finserv offers financing solutions for various home appliances and cooling systems.Benefits of shopping with Bajaj Finserv's financing options
- Affordable pricing: Get competitive prices on window air conditioners at Bajaj Finserv partner stores, ensuring a cost-effective purchase.
- Easy EMIs: Spread the cost into manageable monthly instalments with Bajaj Finserv’s financing options.
- Zero down payment: Selected window AC models come with a zero down payment option, allowing you to pay conveniently over time.
- Wide range and accessibility: Choose from an extensive collection of window air conditioners to find the best fit for your cooling needs.
- Special deals and cashback: Enjoy exclusive discounts and cashback offers when purchasing a window AC.
- Free home delivery available: Get complimentary home delivery on select models for a hassle-free shopping experience.
Air conditioners
ACs by capacity
Budget
Star rating
AC comparison
AC buying guide
Bajaj Finserv App for all your financial needs and goals
Trusted by 50 million+ customers in India, Bajaj Finserv App is a one-stop solution for all your financial needs and goals.
You can use the Bajaj Finserv App to:
Apply for loans online, such as Instant Personal Loan, Home Loan, Business Loan, Gold Loan, and more.
You can use the Bajaj Finserv App to:
Apply for loans online, such as Instant Personal Loan, Home Loan, Business Loan, Gold Loan, and more.
- Explore and apply for co-branded credit cards online.
- Invest in fixed deposits and mutual funds on the app.
- Choose from multiple insurance for your health, motor and even pocket insurance, from various insurance providers.
- Pay and manage your bills and recharges using the BBPS platform. Use Bajaj Pay and Bajaj Wallet for quick and simple money transfers and transactions.
- Apply for Insta EMI Card and get a pre-approved limit on the app. Explore over 1 million products on the app that can be purchased from a partner store on Easy EMIs.
- Shop from over 100+ brand partners that offer a diverse range of products and services.
- Use specialised tools like EMI calculators, SIP Calculators
- Check your credit score, download loan statements, and even get quick customer support—all on the app.
Frequently asked questions
How do I install a window air conditioner?
To install a window air conditioner, start by measuring the window opening to ensure that the unit fits properly. Open the window and place the AC on the windowsill, securing it with the side panels. Extend and fasten the panels to block gaps, then use screws or brackets to stabilise the unit. Tilt the AC slightly backward to allow proper drainage. Seal any remaining gaps with foam insulation for better efficiency. Finally, plug in the unit and test its cooling performance. Regular maintenance, such as cleaning filters and checking for air leaks, ensures long-term efficiency.
Can I install a window AC unit myself?
Yes, installing a window AC unit yourself is possible with the right tools and safety precautions. Most modern window ACs come with easy-to-follow instructions and installation kits. The key steps include securing the unit on the window frame, ensuring proper drainage, and sealing any gaps to prevent air leaks. If the unit is heavy, having an extra pair of hands can make the process safer and easier. For more complex installations, such as mounting on a concrete wall, professional assistance may be required. Proper installation ensures optimal cooling and extends the lifespan of the AC.
What tools do I need to install a window AC?
Installing a window AC requires basic tools for a secure and stable setup. A measuring tape is needed to ensure that the AC fits the window opening. A screwdriver and drill help fasten mounting brackets and support frames. Foam insulation strips are useful for sealing gaps around the unit, improving energy efficiency. A level ensures that the AC sits evenly, preventing improper drainage. Additional tools like a utility knife and weatherproof sealant help with adjustments and sealing. For heavy units, using a support bracket provides extra stability, reducing the risk of the AC shifting or falling.
How do I secure a window AC unit?
To secure a window AC unit, first install the mounting brackets provided in the installation kit. Place the AC in the window, ensuring it sits evenly and tilts slightly backward for proper drainage. Extend the side panels and fasten them tightly to prevent gaps. Use screws or additional brackets to hold the unit in place, reducing the risk of movement. Apply foam insulation or weatherproof sealant around the edges to prevent air leaks. For extra safety, consider installing a support bracket underneath the AC to distribute its weight evenly and prevent accidental displacement.
How do I install a window air conditioner?
To install a window air conditioner, start by measuring the window opening to ensure that the unit fits properly. Open the window and place the AC on the windowsill, securing it with the side panels. Extend and fasten the panels to block gaps, then use screws or brackets to stabilise the unit. Tilt the AC slightly backward to allow proper drainage. Seal any remaining gaps with foam insulation for better efficiency. Finally, plug in the unit and test its cooling performance. Regular maintenance, such as cleaning filters and checking for air leaks, ensures long-term efficiency.
Show More
Show Less


