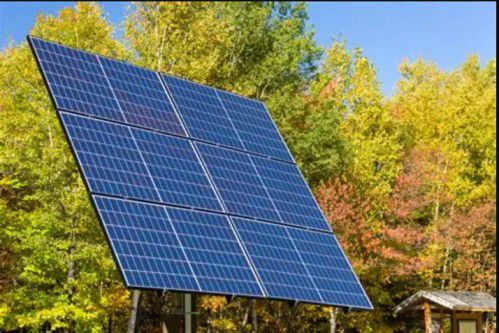







The cost of solar panel installation depends on several factors, with system size being the most important. Larger solar systems require more panels and a bigger inverter, which increases the overall cost. The type of solar panel you choose also affects the price, with monocrystalline and TOPCon panels generally costing more than standard options. Other factors such as inverter type, roof design, installation complexity, and labour charges can add to the total expense. Government subsidies, local installation costs, and the solar installer you choose also play a key role in determining the final solar panel installation cost and long-term system performance.
Get a pre-approved loan offer of up to Rs. 5 lakh
Quick approval | Flexible Tenure Options | Zero Approval Fees
What determines the cost of solar panel installation?
What components are included in solar panel installation cost?
A complete solar installation cost is not just the price of panels on a roof, it covers every component needed to generate, convert, and safely deliver electricity to your home. The table below breaks this down:
| Component | What it covers |
| Solar panels | Photovoltaic modules that capture sunlight and convert it into DC electricity, typically 12 to 14 panels for a mid-sized system |
| Solar inverter | Converts DC power from the panels into usable AC power, available as string inverters for on-grid systems and hybrid inverters for backup-enabled systems |
| Mounting structure | Galvanised steel or aluminium frames that secure panels to the roof and withstand wind loads and weather exposure |
| Wiring and protection devices | DC and AC cables, junction boxes, earthing equipment, and surge protection devices that ensure safe power transfer |
| Net metering setup | The bidirectional meter and DISCOM application process that allows surplus power to be exported to the grid for billing credits |
| Battery bank (optional) | Required only for off-grid or hybrid systems, this stores surplus power for use during outages or at night |
| Installation labour | Charges for site preparation, panel mounting, electrical wiring, testing, and final commissioning by trained technicians |
How much does solar panel installation cost by system size?
Your total solar panel installation cost rises with system capacity, though larger systems generally cost less per kW due to economies of scale on panels and labour. Here is the indicative pricing range across common system sizes in 2026.
| System size | Installation cost (before subsidy) | Estimated subsidy | Cost after subsidy |
| 1 kW | Rs. 65,000 – Rs. 85,000 | Up to Rs. 30,000 | Rs. 35,000 – Rs. 55,000 |
| 2 kW | Rs. 1,30,000 – Rs. 1,70,000 | Up to Rs. 60,000 | Rs. 70,000 – Rs. 1,10,000 |
| 3 kW | Rs. 1,90,000 – Rs. 2,40,000 | Up to Rs. 78,000 | Rs. 1,12,000 – Rs. 1,62,000 |
| 4 kW | Rs. 2,50,000 – Rs. 2,90,000 | Up to Rs. 78,000 | Rs. 1,72,000 – Rs. 2,12,000 |
| 5 kW | Rs. 3,00,000 – Rs. 3,60,000 | Up to Rs. 78,000 | Rs. 2,22,000 – Rs. 2,82,000 |
| 10 kW | Rs. 6,20,000 – Rs. 7,20,000 | Up to Rs. 78,000 | Rs. 5,42,000 – Rs. 6,42,000 |
Note that the central subsidy under PM Surya Ghar Yojana is capped at Rs. 78,000 for systems of 3 kW and above, so the relative savings shrink as a percentage of cost for larger installations. State-level top-up subsidies, where applicable, are calculated separately and disbursed in addition to this central amount.
What factors increase or reduce solar panel installation costs?
Beyond system size, several practical choices can move your final solar panel installation cost up or down. Knowing these in advance helps you negotiate quotes with more confidence:
- Premium panel brands: Choosing high-efficiency monocrystalline or TOPCon panels from established manufacturers raises the upfront cost by 10 to 20 percent but improves generation per square metre and comes with longer performance warranties of up to 25 years.
- Battery backup: Adding a battery bank for hybrid or off-grid configurations can add Rs. 50,000 to Rs. 1,50,000 or more to your total cost, depending on battery chemistry and storage capacity, and off-grid systems do not qualify for the PM Surya Ghar subsidy.
- Roof complexity: Sloped, tiled, or multi-level roofs require custom mounting structures and additional labour hours compared to flat concrete roofs, which can raise installation charges by 10 to 15 percent.
- Subsidy eligibility: Installing ALMM-listed, DCR-compliant panels through an MNRE-empanelled vendor is essential to claim the PM Surya Ghar subsidy, since non-compliant systems are not eligible regardless of quality.
- State-level incentives: Several states, including Delhi, offer additional top-up subsidies on top of the central scheme, which can lower your net cost further depending on your location.
- Number of quotes compared: Getting at least three quotes from MNRE-empanelled installers before deciding helps you identify a fair market price and avoid overpaying for the same system specifications.
What is the solar panel installation process?
Installing a solar system follows a defined sequence of steps that is largely managed by your empanelled installer from site visit to subsidy disbursement.
- Site survey and system design: A qualified solar engineer visits your property to assess roof dimensions, structural strength, shading patterns, and orientation, then prepares a customised layout for panel placement, inverter sizing, and mounting structure.
- Registration on the PM Surya Ghar portal: You or your installer register the installation on the PM Surya Ghar Yojana portal, submitting your electricity consumer number and DISCOM details to initiate both the subsidy application and DISCOM feasibility review.
- DISCOM feasibility approval: Your electricity distribution company reviews the technical feasibility of connecting your rooftop system to the existing grid infrastructure, with approval typically granted within a few weeks.
- Procurement and installation: Once approved, the installer procures ALMM-listed panels, a compatible inverter, and mounting hardware, then completes the physical installation, wiring, and junction box setup on site, usually within two to three days for a mid-sized system.
- Net metering and connection: The installer applies for a net metering connection that allows surplus power to be exported to the grid, after which the DISCOM installs a bidirectional meter to complete the setup.
- Subsidy disbursement: Once net metering is confirmed and the completion report is submitted on the portal, your central subsidy is disbursed directly to your registered bank account, with state subsidies processed separately where applicable.
What are the long-term benefits of investing in solar panels?
A solar installation delivers savings and value well beyond its upfront cost, compounding steadily over a 25-year panel lifespan.
- Lower electricity bills: Generating your own power reduces dependence on grid electricity, with most households saving Rs. 3,000 to Rs. 6,000 a month depending on system size and consumption patterns.
- Protection from tariff hikes: Once installed, your solar system locks in a large share of your energy cost for the next two decades, insulating you from annual increases in grid electricity tariffs.
- Minimal maintenance: Beyond periodic cleaning and an annual professional inspection, solar systems require little ongoing upkeep, with annual maintenance costs typically under Rs. 1,500.
- Higher property value: Homes with a working rooftop solar installation and valid subsidy documentation often command a premium during resale, since buyers value the reduced running cost.
- Reliability during outages: Hybrid systems with battery backup continue supplying power during grid outages, which is a meaningful advantage in areas with frequent load shedding.
- Lower carbon footprint: A typical 3 kW to 5 kW residential system offsets several tonnes of carbon emissions annually compared to equivalent grid electricity drawn from fossil fuel sources.
How can you reduce solar panel installation costs in India?
A few practical decisions can help you bring down your solar panel installation cost without compromising on system quality or subsidy eligibility.
- Right-size your system: Base your capacity decision on actual monthly consumption rather than maximum available roof space, since an oversized system increases cost without proportionate savings.
- Choose DCR and ALMM-listed panels: Confirm that your panels are on the Ministry of New and Renewable Energy's approved list before signing, as non-compliant panels disqualify you from the central subsidy entirely.
- Avoid unnecessary battery storage: Skip the battery bank if grid outages are infrequent in your area, since this single choice can reduce your total cost by a significant margin.
- Compare multiple installers: Collect at least three detailed quotes from MNRE-empanelled vendors and compare not just price but warranty terms, panel brand, and after-sales service commitments.
- Apply for subsidies early: Submit your PM Surya Ghar application as soon as your installer is finalised, since the scheme is processed on a first-come basis and delays can affect disbursement timelines.
- Spread the cost through financing: Rather than paying the full amount upfront, you can convert your solar panel installation cost into easy instalments through Bajaj Finance Solar Finance.
Get electronics and appliances on Easy EMIs with Bajaj Finance
Upgrading your home with the latest electronics and appliances is now easier and more affordable with Bajaj Finance’s flexible financing options. Follow these steps to get started:
- Explore products on Bajaj Mall: Browse a wide range of electronics and appliances from trusted brands on Bajaj Mall. Compare features like energy ratings, storage capacity, performance settings, and design to choose the right product for your home.
- Visit a partner store: Once you shortlist a model, step into any of Bajaj Finance’s 1.5 lakh partner stores across 4,000 cities in India. See the product in person, talk to experts, and make a confident decision.
- Choose the Easy EMI Loan option: At checkout, select the Bajaj Finance Easy EMI Loan. Avail financing of up to Rs. 5 lakh and split the cost into convenient monthly instalments. Some products also come with a zero down payment option.
- Check your loan eligibility online: Plan better by checking your loan eligibility in minutes. Simply enter your mobile number and OTP to know your pre-approved limit.
- Use the Insta EMI Card for purchases up to Rs. 3 lakh: Already own the Bajaj Finance Insta EMI Card? Use it for instant, paperless checkout and convert your purchases of up to Rs. 3 lakh into Easy EMIs.
More articles
Solar Finance Schemes
Disclaimer
While care is taken to update the information, products, and services included in or available on our website and related platforms/websites, there may be inadvertent inaccuracies or typographical errors or delays in updating the information. The material contained in this site, and on associated web pages, is for reference and general information purpose and the details mentioned in the respective product/service document shall prevail in case of any inconsistency. Subscribers and users should seek professional advice before acting on the basis of the information contained herein. Please take an informed decision with respect to any product or service after going through the relevant product/service document and applicable terms and conditions. In case any inconsistencies observed, please click on reach us.
*Terms and conditions apply